Introduction: The $5,000 Problem and a 1MB Solution
Before TravelVirgins.com, before PHP and MySQL, and even before the widespread internet, there was my Atari 1040ST and a problem that needed solving. It was 1991, and I owned a picture framing business. Like any business owner, I needed a way to accurately calculate costs for custom frames, mats, and add-ons, managing my wholesale prices, and providing clear visuals to customers.
There was a commercial solution available. The catch? A staggering $5,000 price tag. For a small business, that was a huge investment.
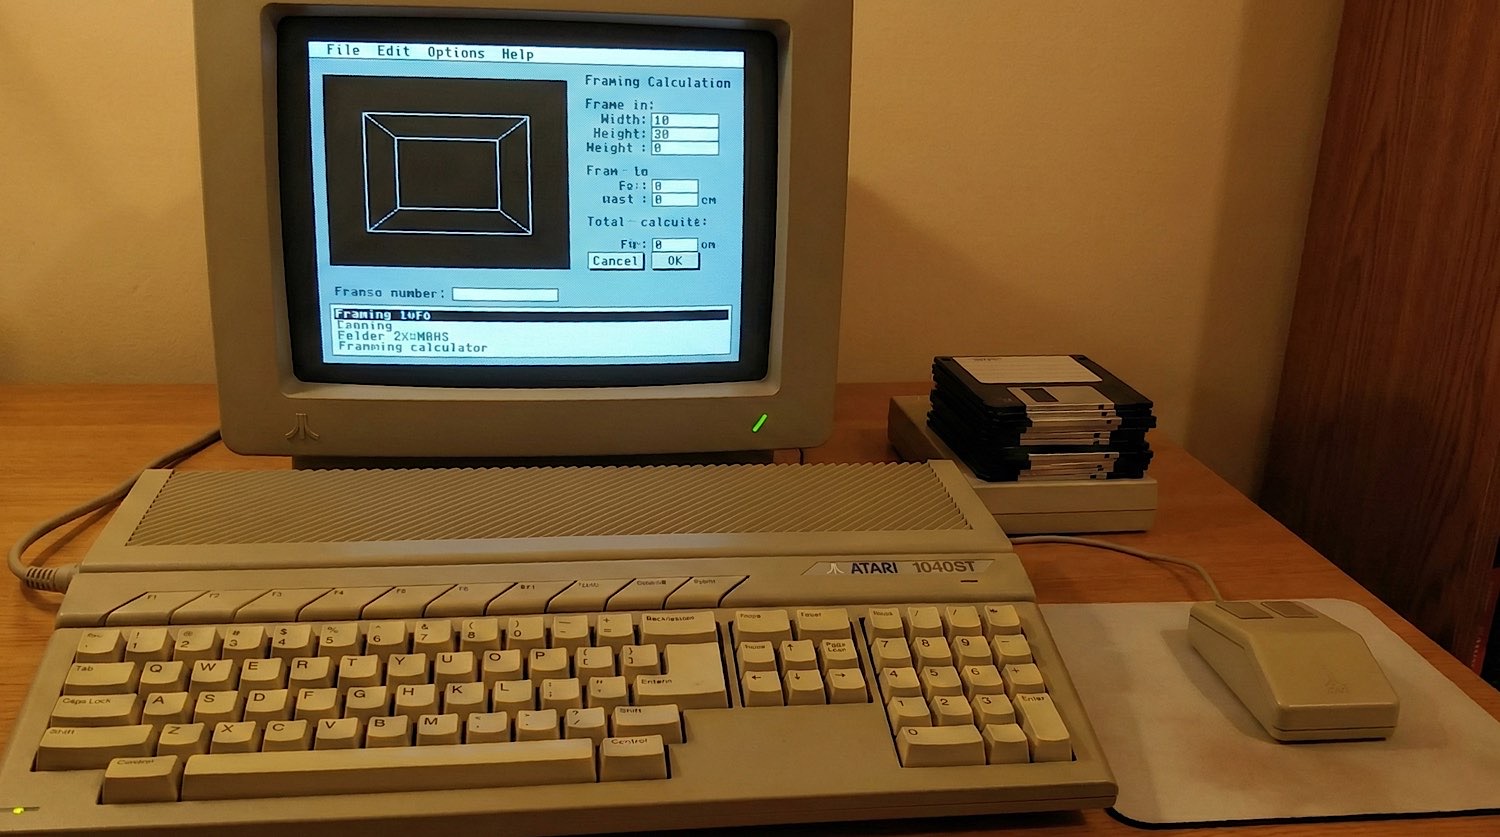
But I had a secret weapon: my Atari 1040ST. It was a powerful (for its time!) 16-bit computer with a whopping 1 megabyte of RAM. While many systems of the day relied on fuzzy TV output, my setup used the Atari's Medium Resolution mode (640x200). This provided 80 columns of crisp text and 4 colors—perfect for coding.
The School of Hard Knocks: Learning Logic Without the Internet
It is important to understand the context of the era: I had absolutely no formal training in coding. There was no Stack Overflow, no YouTube tutorials, and no Google to help me debug a script. I figured out every function and logic loop through relentless trial and error.
Surprisingly, this process unlocked something from my past. The algebra I had learned in school—which had always seemed abstract and useless because no one ever taught us the practical application—suddenly clicked. It became understood and valued. It wasn't just "math" anymore; it was the tool I needed to calculate frame ratios and scaling vectors.
For more complex concepts, like database structures, I had to go old school. I went to the library. I purchased several thick IBM coding books—manuals that technically had nothing to do with Atari coding—and read them cover to cover. I would try to interpret the code on the page, type it into my Atari to see if the logic held up, and slowly started to learn new phrases and naming models. It was advanced conceptual learning by a complete newbie, driven by nothing but determination.
Armed with this self-taught knowledge and my trusty GFA BASIC cartridge, I decided to build my own solution.
My First CAD/POS System: A GFA BASIC Masterpiece
What I ended up creating was more than just a calculator; it was a custom Computer-Aided Design (CAD) and Point-of-Sale (POS) hybrid.
Why GFA BASIC? Unlike standard BASIC interpreters that were slow and used line numbers (like 10 PRINT "HELLO"), GFA was a structured language that felt more like C or Pascal. Crucially, it included a compiler. This meant I could bake my code into a machine-language executable that ran lightning fast.
Here’s what the software could do:
- Real-time Visuals: As I entered dimensions for frame size and mat width, the program would dynamically adjust a visual representation of the finished framed artwork on the screen.
- Smooth Animations: This wasn't just static rendering. The frame and mat would smoothly scale, allowing customers to see exactly how their choices impacted the final look.
- Cost Management: A built-in "database" stored all my wholesale costs for mouldings, mat boards, glass, and hardware.
- Instant Pricing: With all the data, it could instantly calculate the final retail cost, including labor and markup.
Old-School Coding Tricks: XOR, 3D Buttons, and Custom Databases
Building this required some clever tricks, common for the era:
XOR for Animation: To achieve those smooth, flicker-free scaling animations, I used a technique called XOR (Exclusive OR). By drawing an object onto the screen using XOR logic, and then XORing it again in the exact same spot, it would magically disappear, restoring the background perfectly. This allowed for fast redrawing without needing to store or redraw large portions of the screen.
"3D" UI Buttons: The Atari ST's GEM desktop was revolutionary, but interactive elements like buttons needed to be "drawn." To make buttons appear raised or pressed, I manually drew contrasting lines. A "raised" button would have light lines on the top and left, and dark lines on the bottom and right. When clicked, I'd reverse those colors to give the illusion of it being "pressed in."
Here's a simplified GFA BASIC snippet illustrating that 3D button logic:
' GFA BASIC - Simplified 3D Button Drawing Logic
PROCEDURE draw_button(x,y,w,h,state%)
  ' state% 0 = Raised, 1 = Pressed
  IF state%=0
    color1%=0  ' White (Top/Left)
    color2%=1  ' Black (Bottom/Right)
  ELSE
    color1%=1  ' Black (Top/Left)
    color2%=0  ' White (Bottom/Right)
  ENDIF

  COLOR 2 : DEFFILL 2 : PBOX x,y,x+w,y+h

  COLOR color1%
  LINE x,y,x+w,y         ' Top
  LINE x,y,x,y+h         ' Left

  COLOR color2%
  LINE x+w,y,x+w,y+h     ' Right
  LINE x,y+h,x+w,y+h     ' Bottom
RETURN
[ DEMO: CLICK TO TOGGLE STATE ]
Custom Database: With no off-the-shelf database solution for GFA BASIC that fit my needs (or budget!), I designed my own flat-file system. I’d store wholesale costs for mouldings (cost per linear foot), mat boards (cost per square foot), and other components in structured data files. My program would then read these files, perform calculations, and present the final price.
Bridging the Past to the Present: From ST to TravelVirgins.com
Looking back, that framing software was my foundational experience in programming. It taught me:
- Problem-solving: How to break down a complex business need into manageable coding tasks.
- Efficiency: How to make the most of limited resources.
- User Experience (UX): How to design an interface that was intuitive and helpful for customers.
Fast forward to today, and while the tools have changed dramatically, the core principles remain the same. Building TravelVirgins.com and its associated web applications (like my Yahtzee Scoreboard or Euchre Scorepad) still involves designing efficient database schemas (now in MySQL), creating dynamic user interfaces (now with HTML/CSS/JS), and solving real-world problems with code.

My Atari 1040ST may be long gone, and those GFA BASIC floppies have sadly vanished into the mists of time, but the lessons learned building that custom framing program were invaluable. It proved that with a little ingenuity (and a lot of late nights!), you could turn a $5,000 problem into a custom solution.
Modern CSS Recreation
For the developers reading this, here is how I recreated those 1991 "3D" buttons using modern CSS today:
/* The 1991 'Raised' Effect */
.frame-button {
  background: #c0c0c0;
  border-top: 2px solid #ffffff;   /* Light Source */
  border-left: 2px solid #ffffff;
  border-bottom: 2px solid #000000; /* Shadow */
  border-right: 2px solid #000000;
}

/* The 1991 'Pressed' Effect */
.frame-button:active {
  border-top: 2px solid #000000;
  border-left: 2px solid #000000;
  border-bottom: 2px solid #ffffff;
  border-right: 2px solid #ffffff;
}